Ads in Ad Manager are structured like this:
- Orders – a top-level bucket for organizing ads; we don’t use this level very much – mostly it’s a way to group by client or an ad/set of ads they run
- Line items – the information about where and when the ad will run
- Creatives – the actual images
- Line items – the information about where and when the ad will run
Log in at https://admanager.google.com/
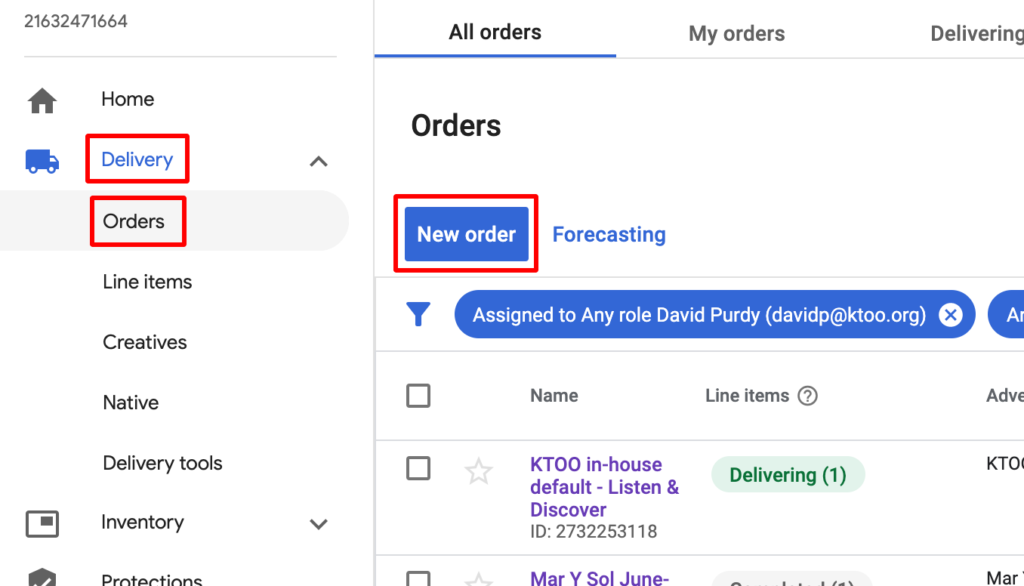
Order
In the left-hand menu, under “Delivery,” click “Orders” and then the “New Order” button
Fill out the Name and Advertiser fields (all the other fields on this screen are optional).

At the bottom, click “Add line item” (you can also click “Save” to come back and add a line item later).

Line item
For “Ad type” click “select display ad”

For the line item, enter the following information
- Name – an admin name to identify the ad(s) in Ad Manager
- Line item type – usually “Sponsorship” (other types, like “Standard,” will prompt you to enter a specific number of impressions)
- Expected creatives – image size for the ad(s) in this line item
- 300×250 (Medium Rectangle) – the default tile size
- 300×600 (Half Page Ad) – is a double-tall ad (which should take up both slots on the home page, for instance)
- Additional settings – Labels – select either “Half page” or “Tile” here (depending on the “expected creative” sizes). This setting is what keeps the home page from displaying both a tile and a half page ad, which would make the section too tall.
- Delivery settings
- Start time
- End time
- Goal – for “Sponsorship” type ads, this is the percent of total impressions you want this line item to get (note that this is within the “line item type” – a higher priority line item will always run first until its percent of impressions is filled)
- Add targeting – select where on the site you want the ad to run.
- Warning: by default, it selects “Run of network,” which means it could run in every ad slot connected to the Ad Manager account.
- Select “Inventory,” then “Ad unites” and choose the ad units you want in the left column. Already-selected ad units are shown in the right column, and you can remove them by clicking the “X” icon.

Click the “Save” button

Creative
In the line item, click the “Creatives” tab, click the “add creative” button, and then choose “New creative” and the creative size you want (which was set above in the “line item” section).
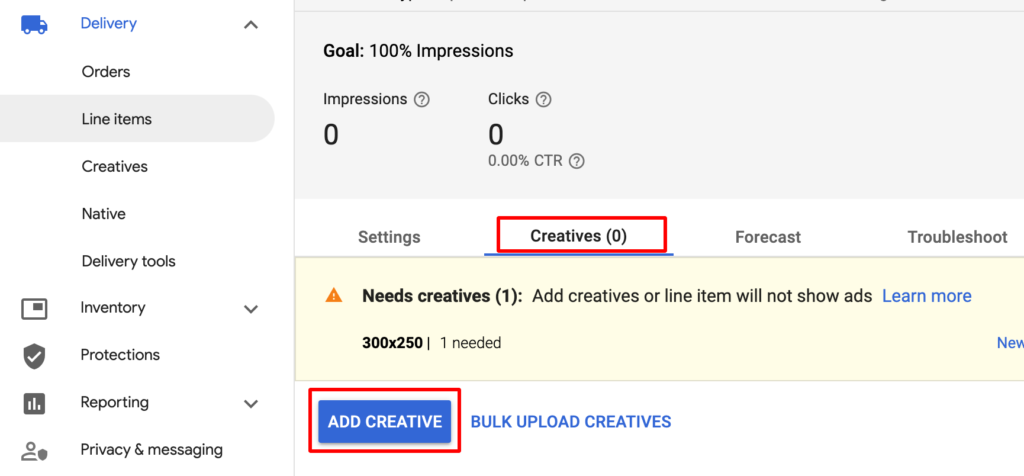

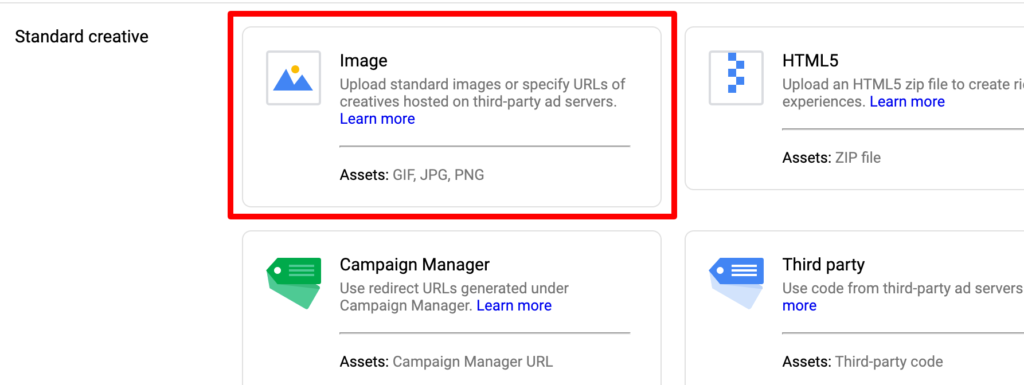
Image-based ads
Most ads are images someone sends you. For this type, choose “Image” for the creative
Fill in the following fields:
- Name
- Image files – these must be the right dimensions or you’ll get an error
- Destination url
Other fields are optional (although “Alt text” is a good idea).
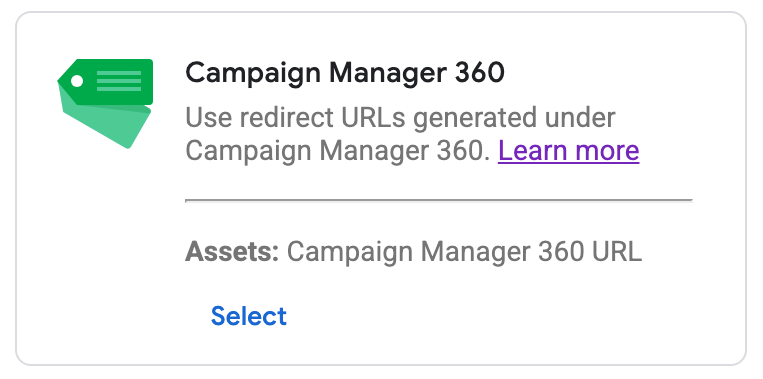
Ad scripts
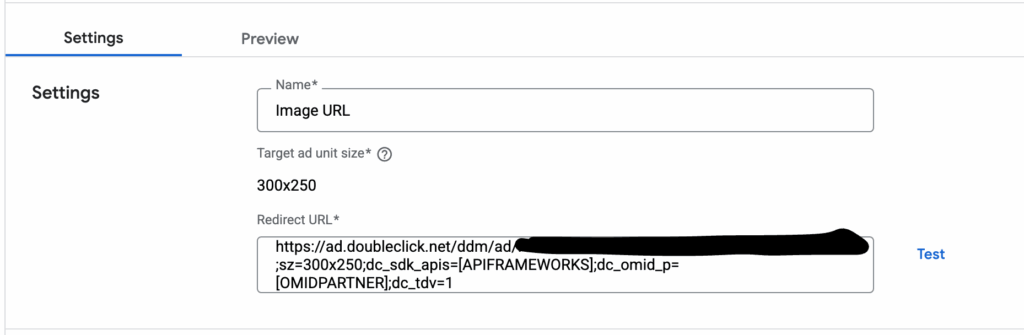
Sometimes a client will send you a script. For that, choose the “Campaign Manager 360” creative type when you make the new creative.
If you have a code that starts with https://ad.doubleclick.net/ddm/ad/, add it to the “Redirect URL” field of the creative.
Save/approve creative
Click “Save”
You’re almost done, but if you it’s a new order, you have to approve it.
Go to the order, and click the “Approve” button

The status will switch to “Ready,” although it can take a while (up to an hour in my experience) for it to switch to “Delivering” and actually start showing up on the site.